![]()
![]() One of my favorite iTunes features is the ability to fade songs in and out of each other with the Crossfade setting, this makes for a seamless music listening experience as each song gradually fades out and into the next and is certainly a worthwhile option to enable.
One of my favorite iTunes features is the ability to fade songs in and out of each other with the Crossfade setting, this makes for a seamless music listening experience as each song gradually fades out and into the next and is certainly a worthwhile option to enable.
By default, this crossfading songs option is not turned on though, so here’s how to change that and flip it on to make for a more enjoyable iTunes listening experience.
For what it’s worth, this works the same in Mac OS X and Windows versions of iTunes. Here’s what you’ll want to do:
How to Enable iTunes Crossfading Between Songs
- Open iTunes and go to ‘Preferences’
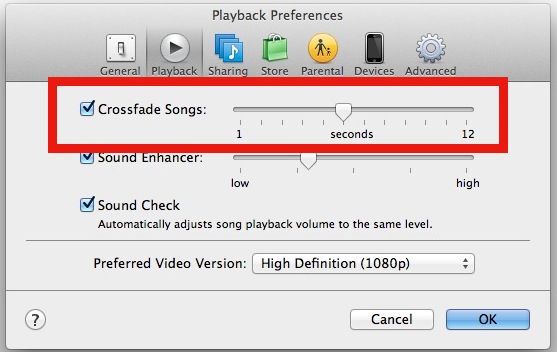
- Click the ‘Playback’ tab icon
- Select the checkbox next to “Crossfade Songs”, it needs to be checked of course
- Adjust crossfading between songs as desired by dragging the slider, I have mine set to 5 seconds, the longer the time is set the more cross-fading in and out of songs
- Select ‘OK’, and play a song or two, the songs will now crossfade!
New versions of iTunes offer the crossfading slider above some other worthwhile settings too:
Older versions of iTunes look slightly different:
Changes are immediate, and you’ll notice them at the start and end of each song playing as it turns into another song.
If all of your music is in the same genre, a really long fade of 12 seconds can sound really nice as each song slowly turns into another without any break in music. I have a pretty diverse musical playlist so I like mine set to 5 seconds, but try out the various settings and pick one that you like.
This feature has been around for quite some time and it should be available to all versions of iTunes regardless of the platform, OS X or Windows, so
Follow Me:
Top Best Sellers!!


