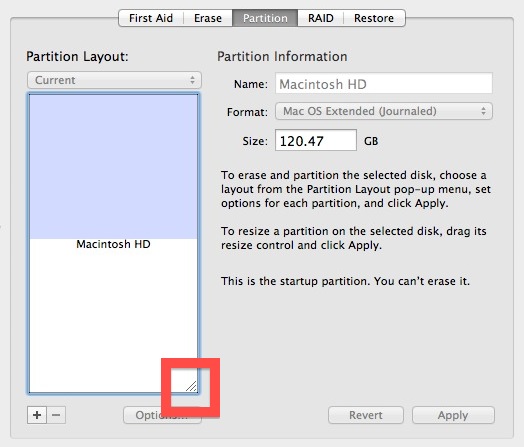
 You can easily resize any disk partition in Mac OS X using the included Disk Utility app, located in /Applications/Utilities, and you can even resize a mounted volume. In fact, you can grow or shrink HFS+ (Mac OS X) Partitions on the fly, with the resizing done live regardless of whether the drive is internal or an external drive, or even the boot volume.
A word of advice: Resizing mounted boot volumes isn’t always the best idea in the world because there’s a tiny potential something could go wrong. Before you go messing around and resizing your partitions, be sure to backup your data using Time Machine or whatever other backup service you prefer and make a recent back up.
Resizing a Mac Drive Partition with Disk Utility
It is recommended to back up the drive before modifying the partition table, do that before beginning. When ready, here is how to resize a partition from OS X:
- Open Disk Utility, found in the /Applications/Utilities/ folder, and select the hard drive with the partitions you wish to resize
- Select the “Partition” tab and then click the partition to resize, then click and hold on the little dragging widget in the corner as shown in the image below
- Size the partition as you wish, then click “Apply” for the changes to take effect


Optionally, click the [+] icon if you need to add a partition, read more about that here


This has been possible from Mac OS X Leopard onward (and obviously Snow Leopard, Lion, and Mountain Lion). As mentioned earlier, it’s always a good idea to back up important data before making adjustments to partition schemes, Time Machine is by far the most efficient way to do so.
[ animated gif from CreativeTechs ]Follow Me:
Top Best Sellers!!


