Windows 10 ships with several apps. One of them is Scan. The Scan app was introduced to replace the classic Windows Fax and Scan program, as it has not seen updates for a long time. Additionally, the Fax function is no longer required.
The new inbox Scan app is pretty good. It offers all the features available in Windows Fax and Scan. However, the Scan app, at times, fails to detect the scanner or throws errors during a scan. Because of this, many users prefer using the old Windows Fax and Scan program.
While Windows Fax and Scan is very much part of Windows 10, many users have noticed that Windows Fax and Scan is missing from their Windows 10 installations. If the Windows Fax and Scan app is missing from your Windows 10 PC and you would like to use it instead of the Scan app, luckily, you can install it again with a few clicks.
Install missing Windows Fax and Scan in Windows 10
Here is how to install Windows Fax and Scan in Windows 10.
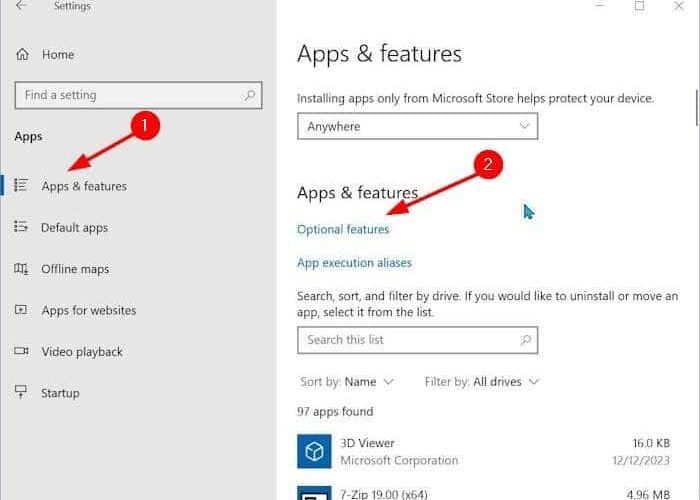
Step 1: Launch the Windows 10 Settings app using search or Windows logo + I hotkey. In the Settings app, navigate to Apps > Apps & features page.
Step 2: On this page, click the Optional features link.


Step 3: Next, click the Add a feature button.


Step 4: On the resulting dialog box, scroll down the list to see Windows Fax and Scan. Select the Windows Fax and Scan entry and then click the Install button to begin installing the Windows Fax and Scan program.


NOTE: If the Windows Fax and Scan is missing from the list, it’s likely because the program has already been installed on your Windows 10 computer. Please use the Start/taskbar search again to find the program.
The installation process might take a few minutes. The Settings app shows the installation progress. Once installed, if asked, please restart your Windows 10 PC once. That’s it!


If you are using Windows Fax and Scan, you might like to read our guide on how to save scanned documents in PDF.


