Have you recently received an XPS file from your friend or colleague and want to open it on your Windows 10/11 PC? Are you unable to find the XPS Viewer software on your Windows 10 or 11 computer? This guide shows you how to install the XPS Viewer app on a Windows 10/11 PC.
As you might already know, XPS stands for XML Paper Specification. It’s a document format very similar to the popular PDF (Portable Document Format). The XPS file format was originally developed to compete with PDF, but PDF still remains the popular one. Just like PDF, an XPS file retains its layout and appearance when opened on a different computer as well.
The XPS Viewer is not part of Windows 11 and its predecessor, Windows 10. However, the official XPS Viewer app is offered under optional features, just like Windows Fax and Scan in Windows 11. Here is how to install XPS Viewer in Windows 10 and 11.
Once the XPS Viewer is installed, you will not only be able to view XPS documents but also copy, print, and sign XPS documents.
Install XPS Viewer on Windows 10 PC
For Windows 11 directions, scroll down the page.
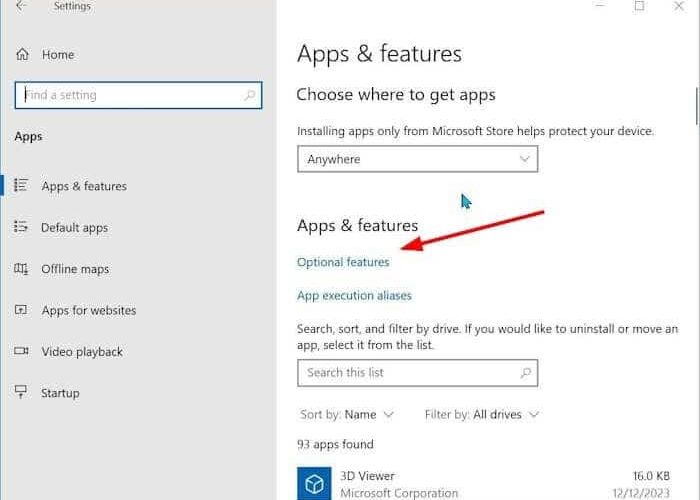
Step 1: Launch Windows 10 Settings. Navigate to Apps > Apps & features page.
Step 2: Here, click the Optional features link.

Step 3: Click Add a feature to open the Add an optional feature dialog.

Step 4: Scroll down the list to see the XPS Viewer. Select the XPS Viewer and then click the Install button. Windows 10 might take a few minutes to complete the XPS Viewer installation.


Install XPS Viewer on Windows 11 computer
Step 1: Open the Windows 11 Settings app. Go to System > Optional features page.

Step 2: On the Optional features page, click the View features button present next to the Add an optional feature option. This will bring up Add an optional feature dialog.

Step 3: Scroll down the list to see the XPS Viewer. Select the XPS Viewer by checking the check box next to it. Click the Next button.

Step 4: Finally, click the Install button to install the XPS Viewer. This process might take about ten minutes to complete.

Once installed, you can launch the XPS Viewer using Start or taskbar search.


