How to Enable and Use Find My Device on Windows 11
Track and lock your PC remotely using your Microsoft account.
Quick Links
- What Is Find My Device on Windows 11?
- How to Turn On Find My Device
- How to Locate or Lock a Device With Find My Device
- How to Turn Off Find My Device
Key Takeaways
- To enable Find My Device, open Settings, navigate to Privacy & Security > Find My Device, and turn on “Find My Device.”
- To track and lock a lost device, head to
Microsoft’s Devices site
, log in to your Microsoft account, select your device, choose “Find My Device,” and click “Find.” - To lock the device, choose “Lock,” add an optional message, and click “Lock.”
If you’d like to be able to locate and lock your Windows 11 PC when it’s lost or stolen, turn on the Find My Device option on it. We’ll tell you how the feature works, how to turn it on, and how to find your missing device with it.
What Is Find My Device on Windows 11?
Find My Device is a built-in Windows 11 feature that lets you track your PC’s location. Think of it as Apple’s Find My feature but for Windows.
Once turned on, you can use your Microsoft account to track your Windows 11 PC on a map. You can even lock the PC so anyone who finds it can’t access your data. The feature also lets you display a message on the lost device, so if someone finds the device, they can return it to you.
How to Turn On Find My Device
To turn on Find My Device, ensure you’re signed in to a Microsoft account and that account is an administrator on your PC.
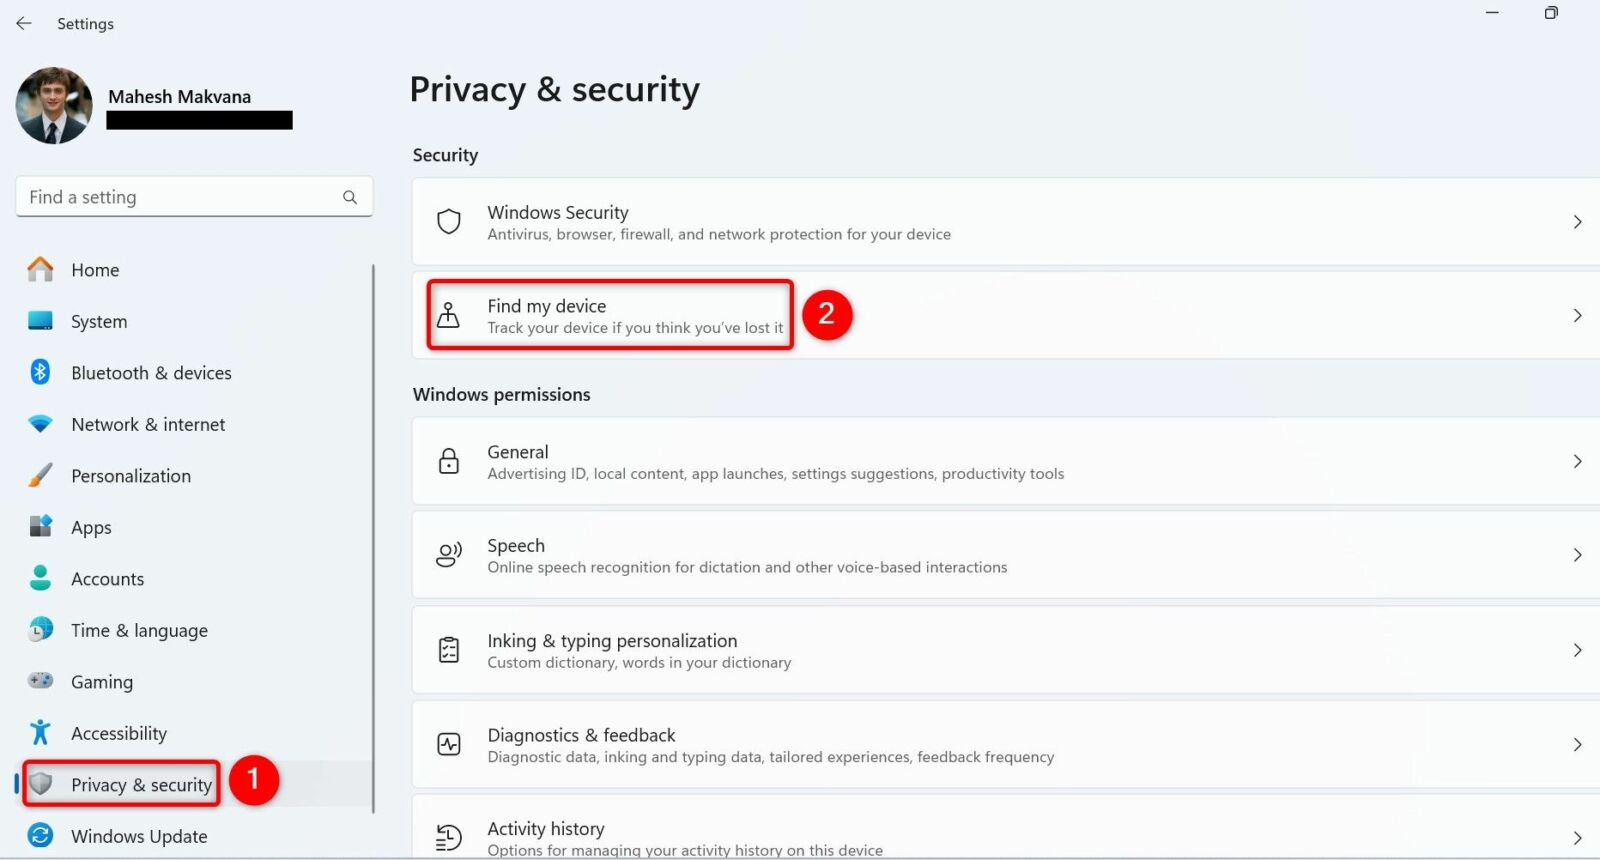
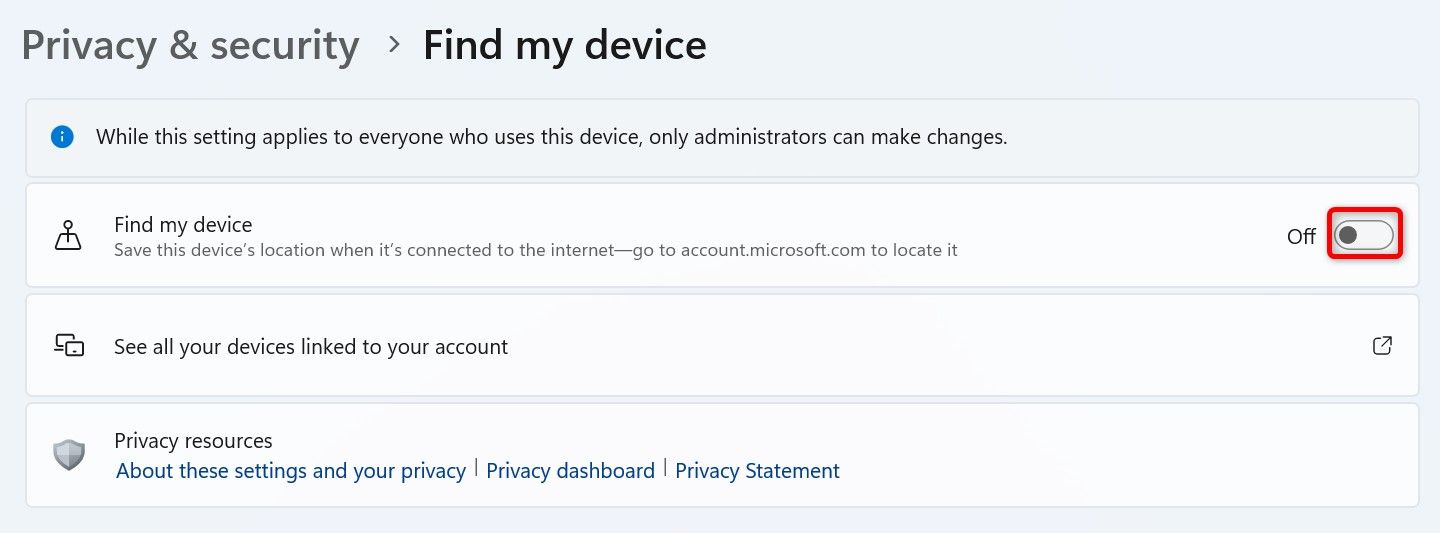
Then, open the Settings app by pressing Windows+i. In the left sidebar, select “Privacy & Security.” On the right pane, choose “Find My Device.”
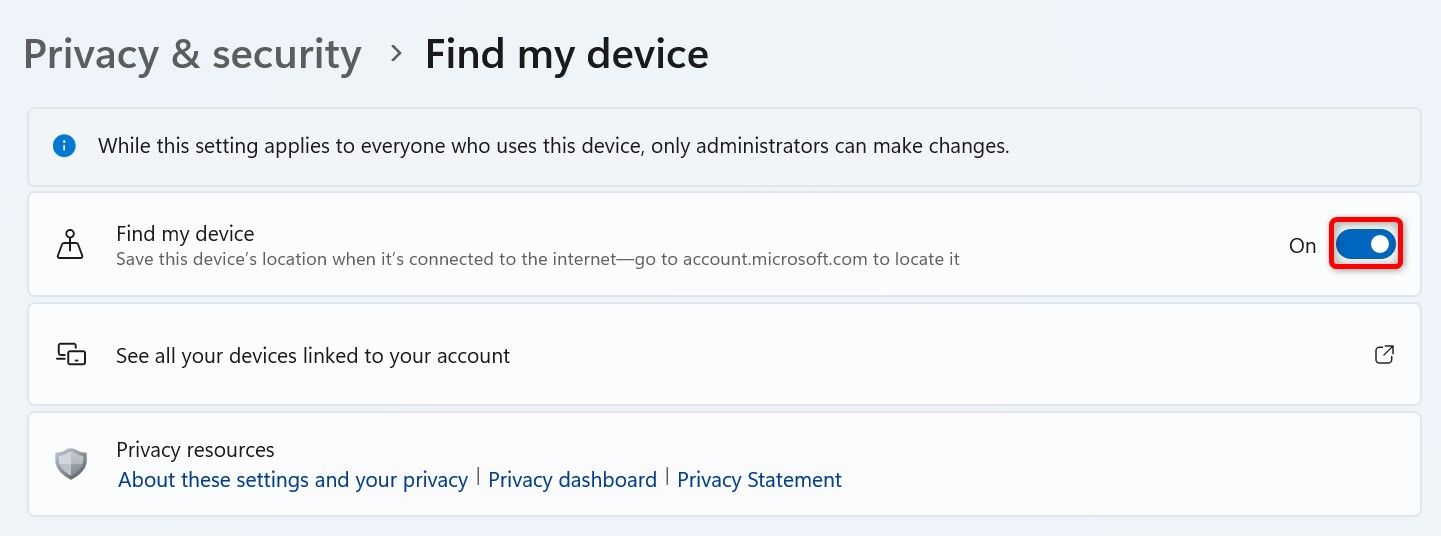
On the following screen, turn on the “Find My Device” toggle.
And that’s all. You’ve successfully enabled the feature on your PC. You can now locate this specific device using your Microsoft account.
How to Locate or Lock a Device With Find My Device
To trace or lock a Find My Device-enabled PC, launch a web browser on your device and head to Microsoft’s Devices page. Sign in to the same Microsoft account that you use on the PC you want to locate.
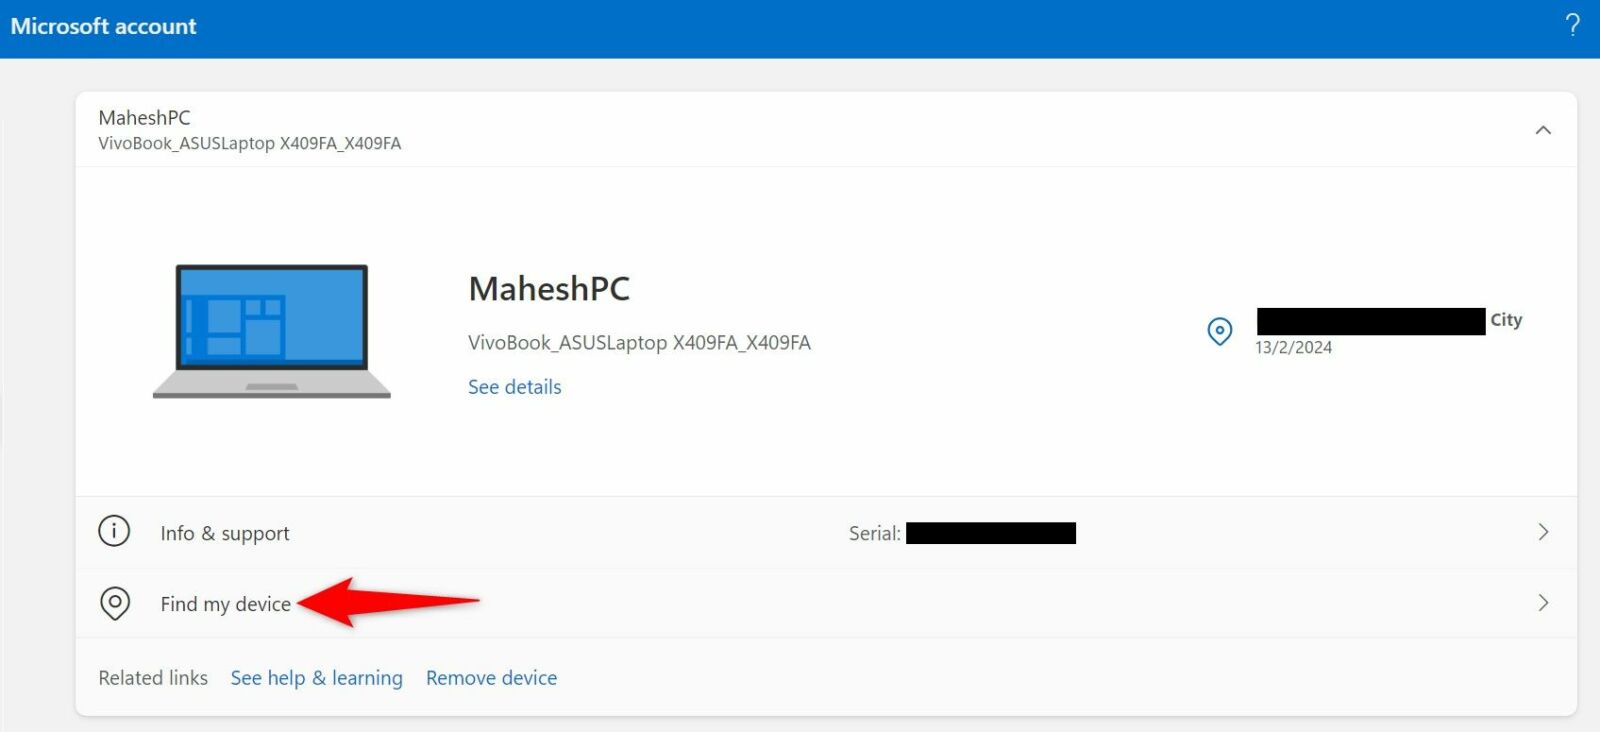
After logging in, select the device you want to locate from the list. Then, choose “Find My Device.”
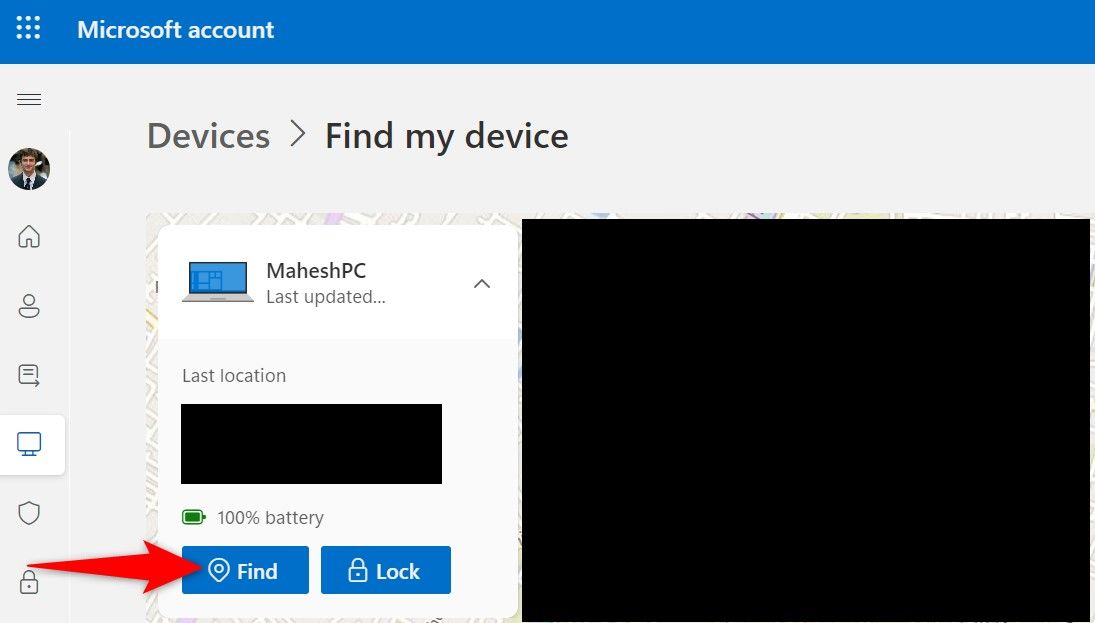
On the device page, click “Find” to begin tracking the device’s location.
If the device’s live location isn’t available, Microsoft will display the last recorded location.
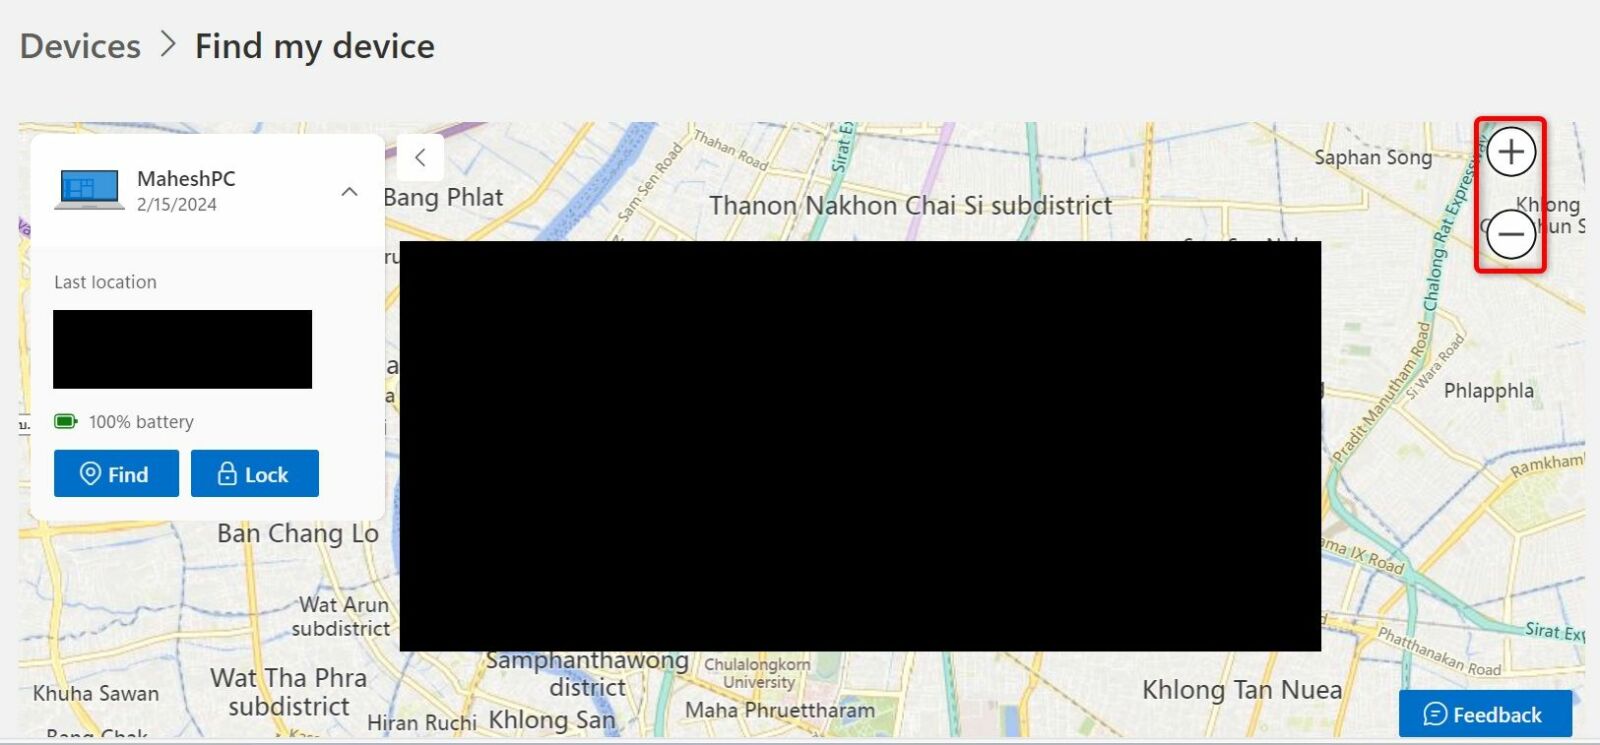
Once the device is found, you’ll see its location on the map. To zoom in, click the “+” (plus) sign on the right of the map. This lets you find your device’s precise location.
When I tried to locate my personal Windows laptop with this feature, I was able to see its exact location on the map. However, note that if you live in a condominium (like I do), it’ll be a bit difficult to find what floor it is on. In this case, you’ll want to look around where you might have likely left it after using it.
Note that Microsoft will display a notification saying an administrator has tried to locate the device on the device you’re trying to find.
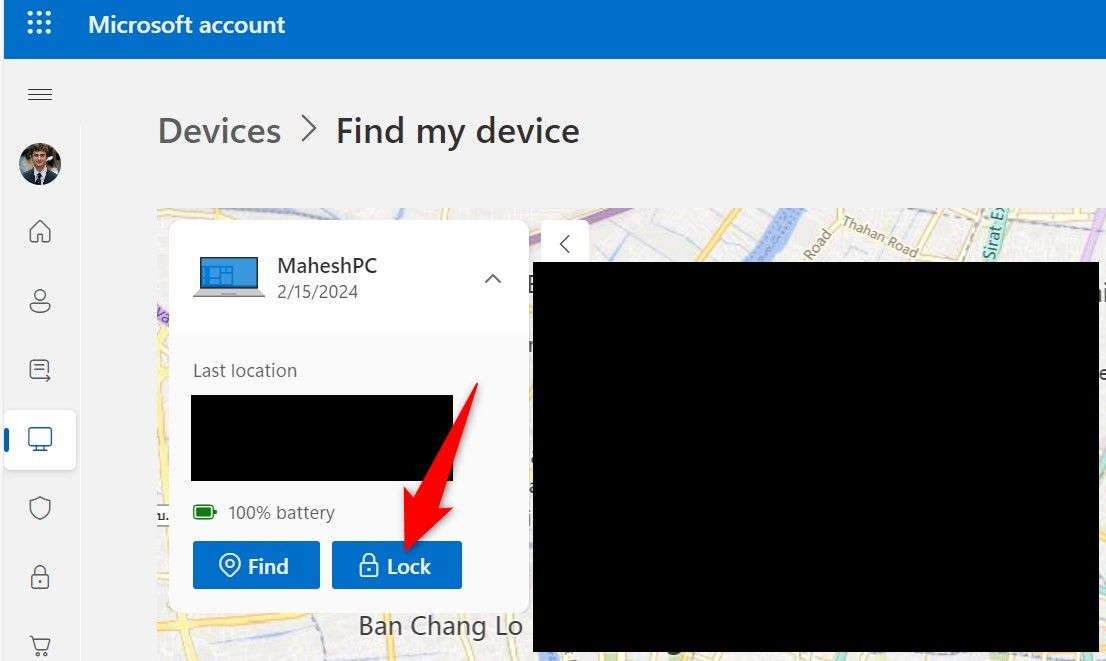
If you want to lock the device so every user on it gets logged out, click the “Lock” button.
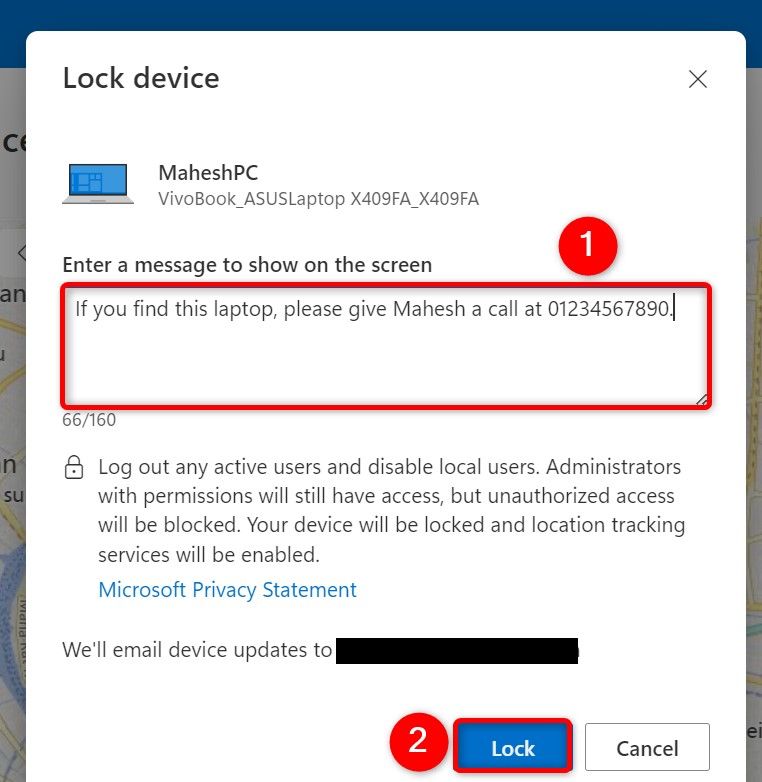
On the “Lock Device” window, add an optional message using the text box so that whoever finds the device has your contact information. Then, at the bottom, click “Lock.”
Microsoft has now locked your device.
How to Turn Off Find My Device
If you don’t wish to be able to remotely find or lock your Windows 11 PC, turn off Find My Device.
Open the Settings app using Windows+i. From the left sidebar, select “Privacy & Security.” On the right pane, choose “Find My Device.”
Toggle off the “Find My Device” option.
You’re set.
And that’s how you ensure your Windows 11 device is traceable when you lose it or someone steals it. Even if you can’t get access to your device, you can at least lock it so people can’t access your data on it. Happy using your PC!
“Tech Bargains Galore: Where Innovation Meets Affordability!”

