How to Fix Windows Modules Installer Worker’s High CPU Usage
Let it finish running, or use these methods to pause it for a while.
Key Takeaways
- Let the Windows Modules Installer Worker process finish running even if it’s using a lot of CPU. It will stop working once the update or maintenance task is complete.
- To stop the process as you want to do something on your PC, open Task Manager, access the “Processes” tab, right-click the process, and choose “End Task.”
- Other troubleshooting methods include running Windows Update troubleshooter, clearing Windows Update cache and pausing the updates, and running the PC’s maintenance tasks at your chosen time.
Windows Modules Installer Worker (TiWorker.exe) is a normal Windows process related to your PC’s updates and maintenance. However, if it uses up a lot of CPU for an extended period it may be due to an error. Here are some things you can do to fix it.
Wait for It to Finish Running
Windows launches the Windows Modules Installer Worker when there’s an update to install or a PC maintenance task to run. You should generally let the process finish running, even if it’s using up a lot of CPU.
When the update or maintenance task has finished, the process will stop running.
If it continues to run for an extended period or you want to perform other tasks, use the troubleshooting tips below.
Run Windows Update Troubleshooter
Windows Modules Installer Worker often runs longer than expected when there is a problem with an update. In this case, run the Windows Update troubleshooter to find and fix any update problems.
Microsoft is phasing out troubleshooters in favor of the Get Help app on Windows 11. In the future, use that app to resolve issues with your PC.
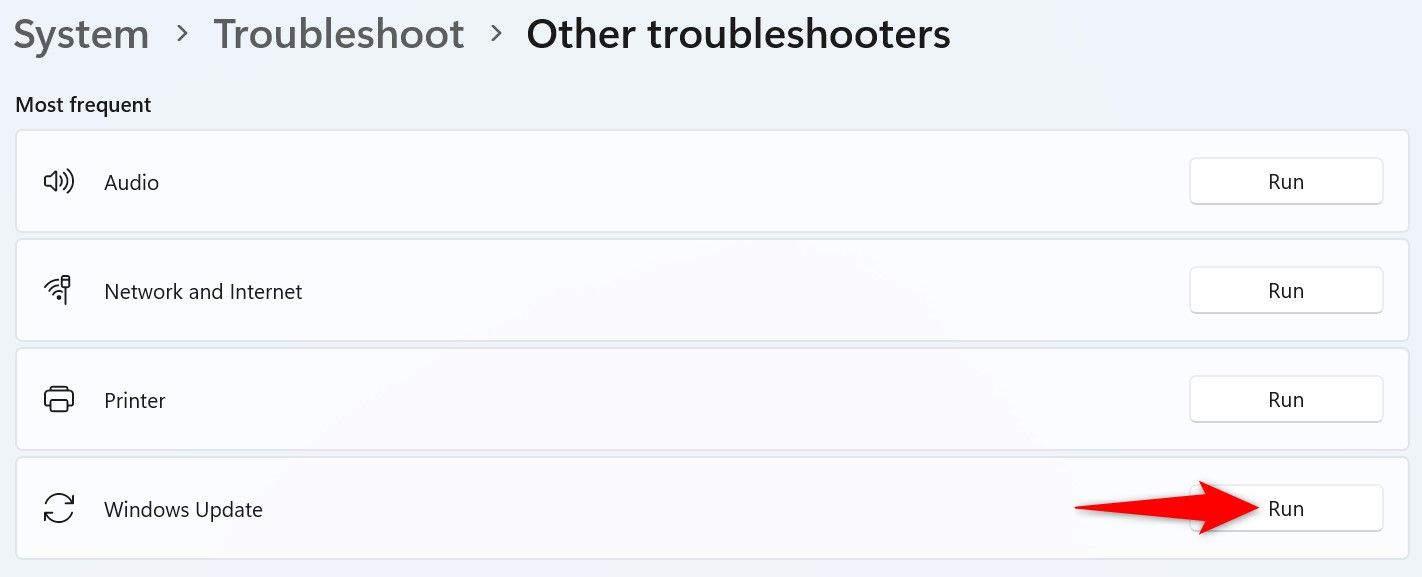
If you’re on Windows 11, navigate to Settings > System > Troubleshoot > Other Troubleshooters, then click the “Run” button next to Windows Update.
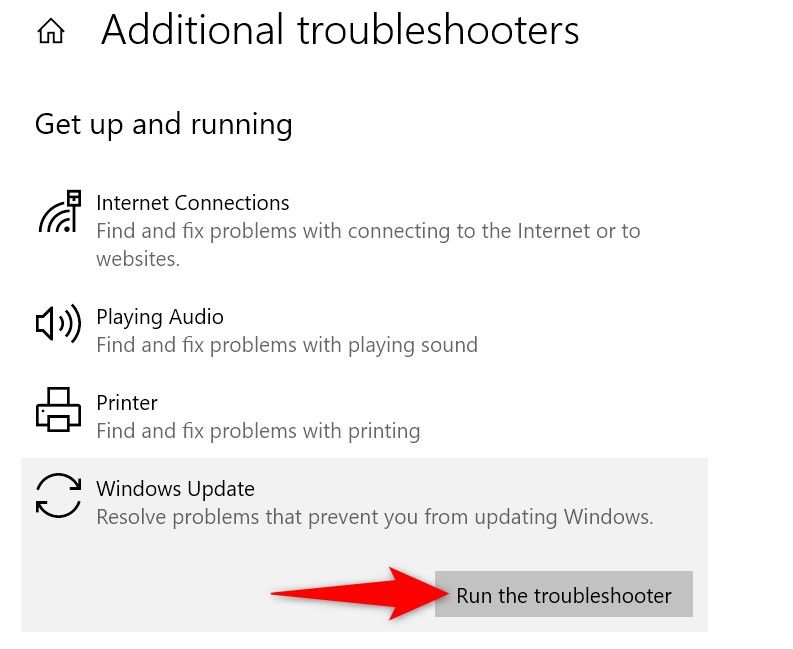
On Windows 10, head to Settings > Update & Security > Troubleshoot > Additional Troubleshooters. Select “Windows Update” and click “Run the Troubleshooter.”
Follow the on-screen instructions in the tool to resolve any update issues.
Temporarily End the Windows Modules Installer Process
If you need to perform a task and the Windows Modules Installer Worker process is using up so much CPU that your PC has become unresponsive, you can temporarily end the process. We don’t recommend you do this unless you have a really need to.
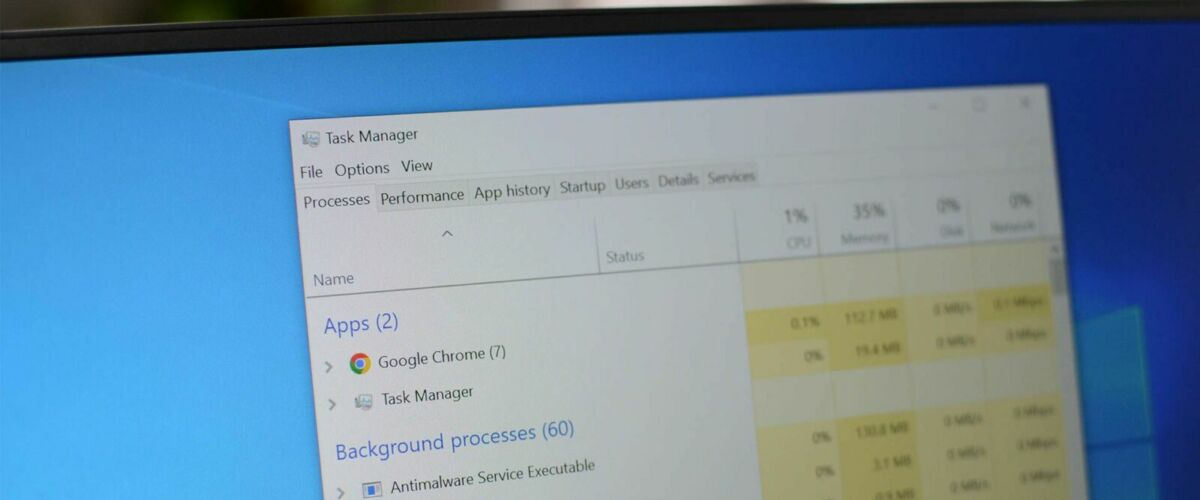
To end the process, right-click the Start Menu icon and select “Task Manager.” Open the “Processes” tab, right-click “Windows Modules Installer Worker,” and select “End Task.”
Clear Windows Update Cache and Pause Updates
If you want to prevent Windows Modules Installer Worker from running, clear your Windows Update cache and pause the updates. This way, the process won’t have updates to install and won’t be able to check for new updates.
We don’t recommend pausing updates as newer updates often bring bug fixes and security patches that improve and safeguard your system.
To start, open a Run window by pressing Windows+R, then type the following in the box and press Enter:
services.msc
Find the service named “Windows Update.” Right-click it and select “Stop.”
Open Run again by pressing Windows+R, type the following path in the box, and press Enter:
C:WindowsSoftwareDistribution
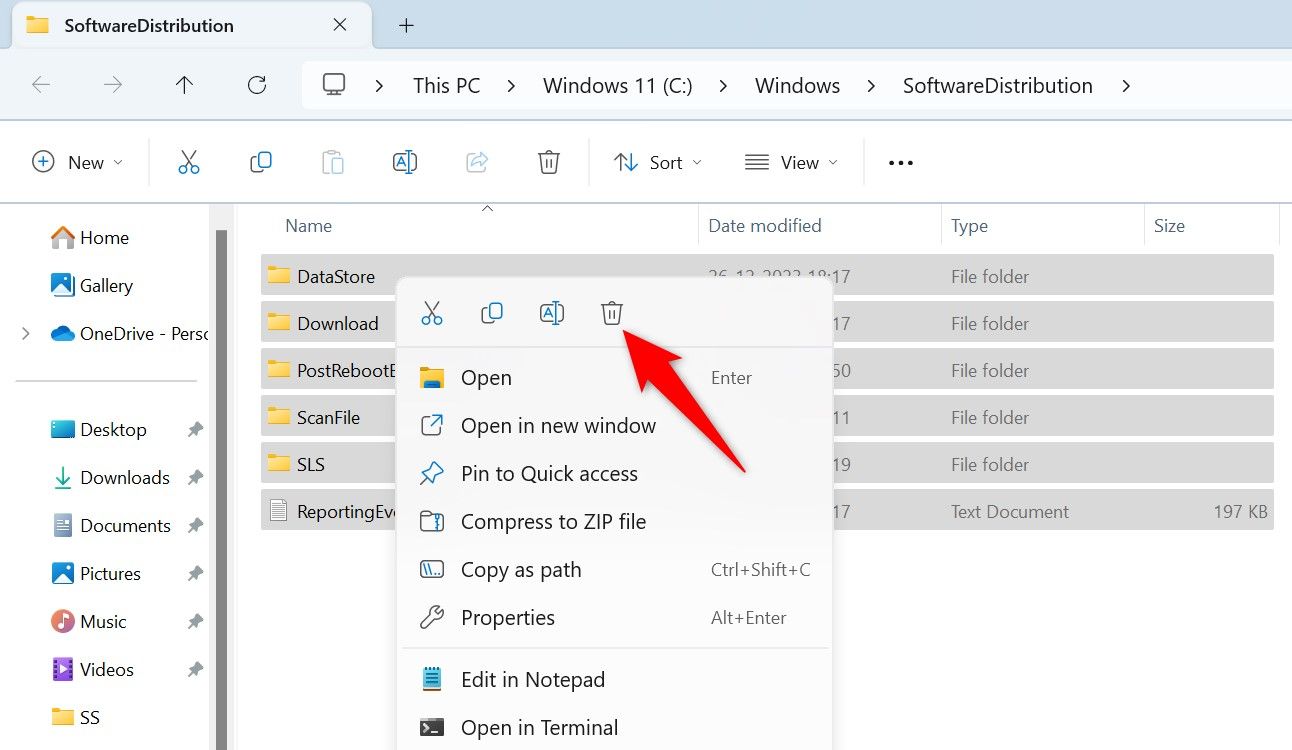
Select all files in the folder by pressing Ctrl+A, then right-click a selected file and choose “Delete” (a trash can icon on Windows 11). Make sure to empty the Recycle Bin as well.
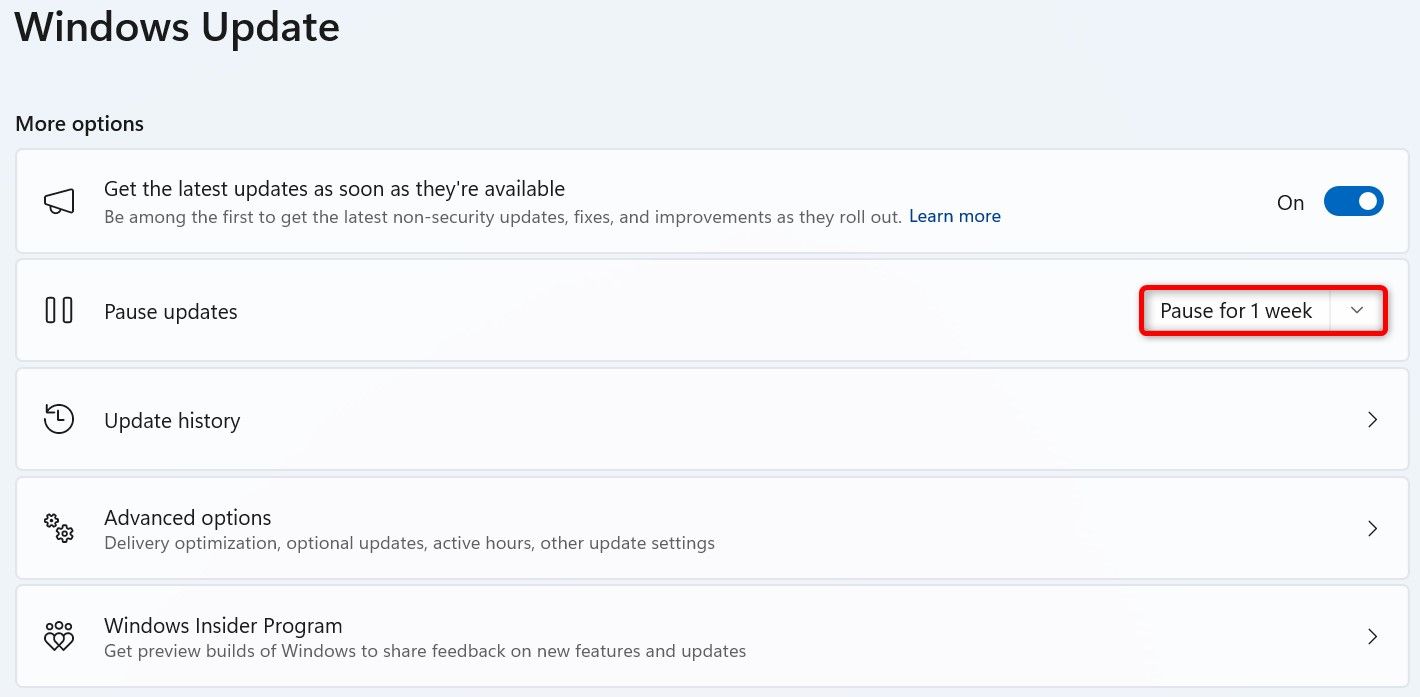
Now that your update cache is deleted, pause the updates. On Windows 11, navigate to Settings > Windows Update. On the right pane, next to “Pause Updates,” click the drop-down menu and choose how long to pause the updates.
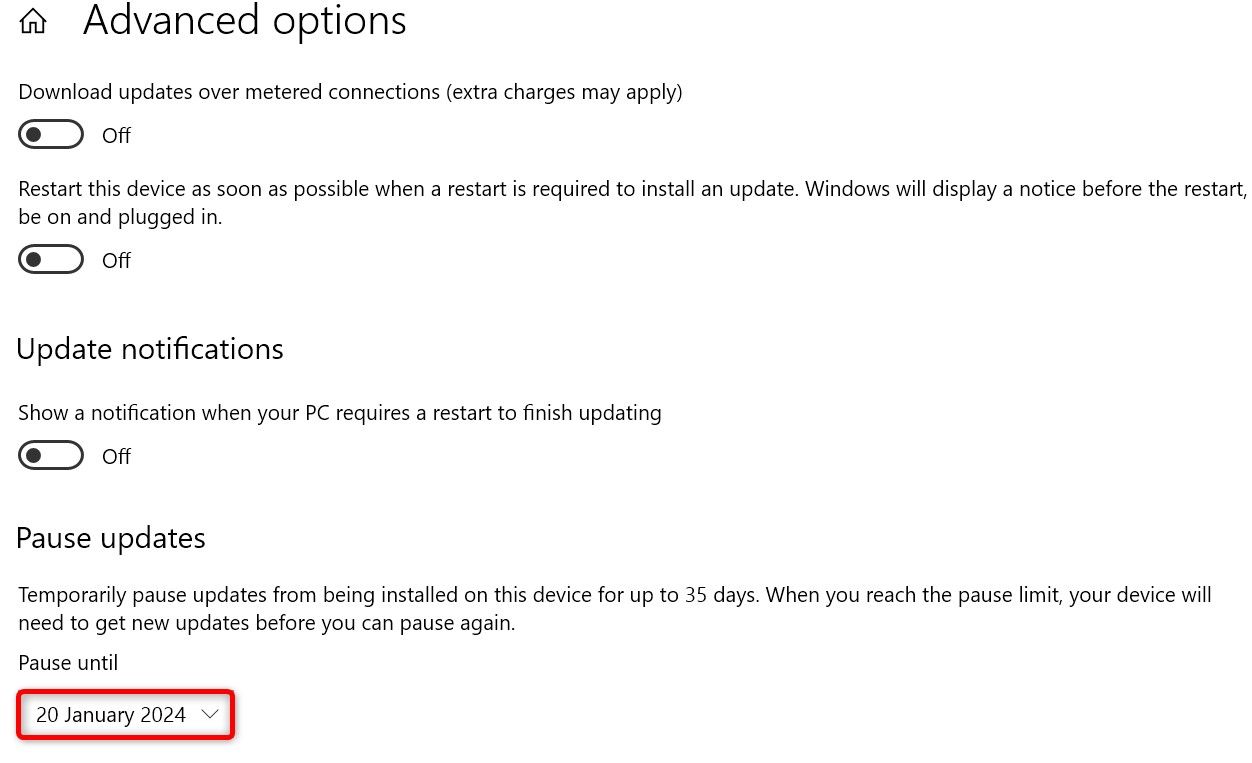
On Windows 10, go to Settings > Update & Security > Windows Update. On the right pane, click “Advanced Options.” In the “Pause Updates” section, click the “Pause Until” drop-down menu and select a time duration.
Run Computer Maintenance at Your Specified Time
Windows Modules Installer Worker runs when your PC is performing a maintenance task. Luckily, you can change when the system runs those tasks, allowing you to prevent the process from running when you’re working on important tasks.
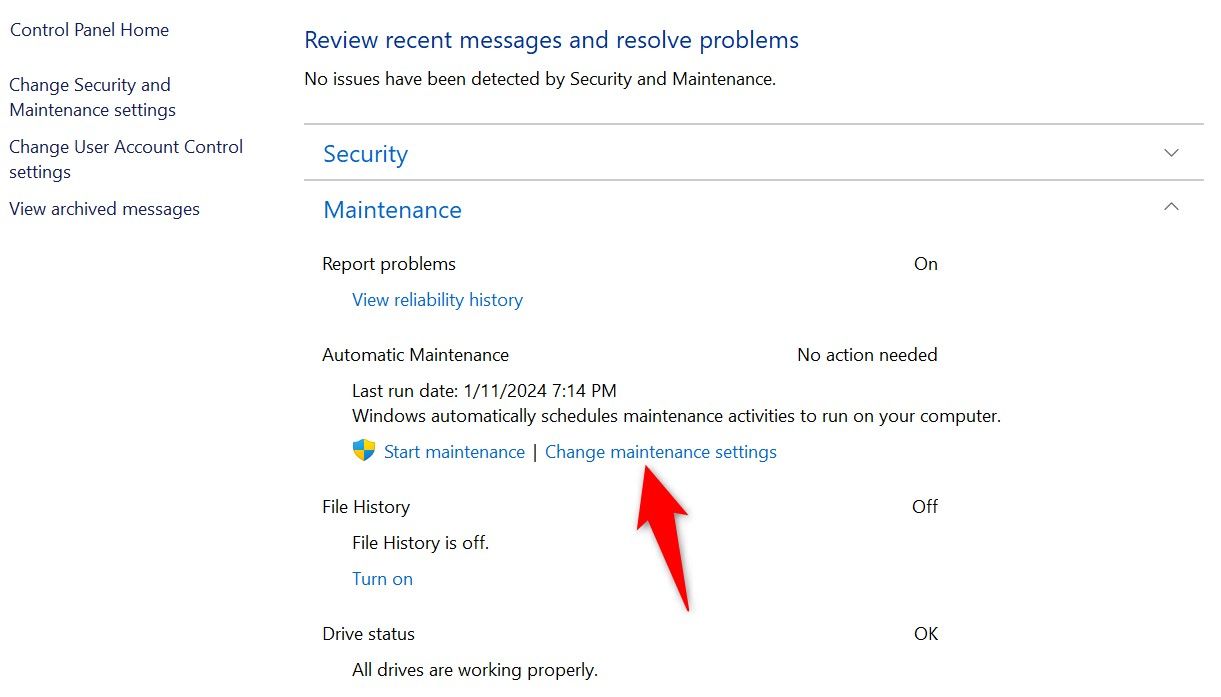
To make that change, open the Start Menu and find “Security and Maintenance”. Click it to open it. Then, expand the “Maintenance” section and choose “Change Maintenance Settings.”
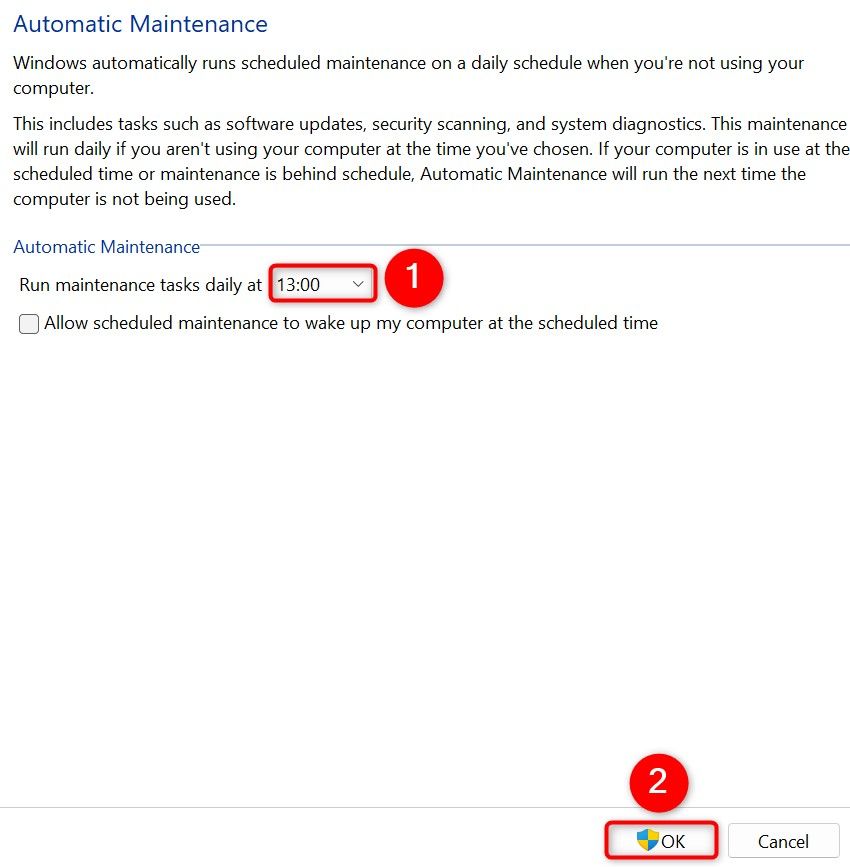
Select the “Run Maintenance Tasks Daily at” drop-down menu and select when you want your PC to run the maintenance tasks. This should be when you aren’t working on important tasks on your PC. Then, select “OK.”
And that’s all there is to eliminating or reducing Windows Modules Installer Worker’s CPU usage on a Windows computer. It isn’t the only process related to Windows Updates that can cause problems, though. There are other troubleshooting steps you can try if Windows Update is stuck.
“Tech Bargains Galore: Where Innovation Meets Affordability!”

