In this post, we will show you how to install and use the NVIDIA App on a Windows 11 PC. NVIDIA is introducing the new NVIDIA app that offers users a unified GPU control center to view and modify the graphics settings for their NVIDIA GPUs. The app combines the key functionalities of the NVIDIA Control Panel and the GeForce Experience app, allowing users to download the latest driver updates, change in-game settings or driver settings, discover other NVIDIA apps, and do more – all from a single place.

What does NVIDIA app do?
The new NVIDIA app focuses on providing an enhanced user experience to gamers and content creators. It features a cleaner, more responsive UI, redesigned in-game overlay, improved driver information, and Shadowplay 120fps support. The app also offers AI-powered filters such as RTX HDR and RTX Dynamic Vibrance to personalize the visual aesthetics of games on RTX-equipped systems.
The best thing about the app is that users are no longer required to log in to an NVIDIA account to download driver updates or optimize in-game settings. It will eventually integrate the remaining NVIDIA Control Panel features and attributes from GeForce Experience, such as GPU overclocking and driver rollback.
How to install and use NVIDIA App on Windows 11
To install and use NVIDIA app on Windows 11, your system must meet the following requirements:
- Operating System: Windows 10, Windows 11
- RAM: 2GB system memory
- Required Disc Space: 600 MB
- Driver: GeForce 551.52 Driver or later
- CPU: Intel Pentium G Series, Core i3, i5, i7, or higher/ AMD FX, Ryzen 3, 5, 7, 9, Threadripper or higher.
- GPU: GeForce RTX 20, 30, and 40 Series GPUs/ GeForce GTX 800, 900, 1000, 1600 Series GPUs/ GeForce MX100, MX200, MX300, 800M, and 900M GPUs.
Download and install the new NVIDIA app
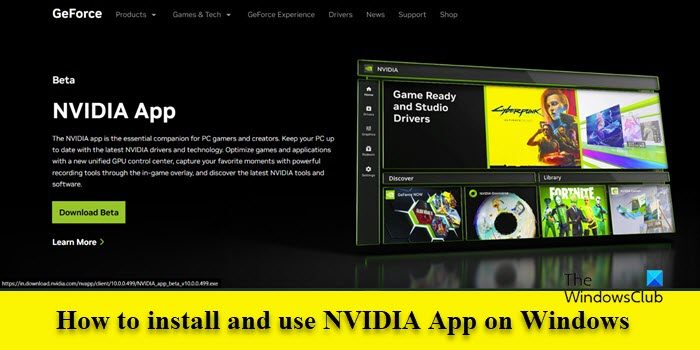
You can download the beta version of the new NVIDIA app from NVIDIA’s official website using this link. Once the download is complete, double-click on the executable to run the installation wizard.

You’ll be prompted to upgrade to the NVIDIA app (the installation upgrades GeForce Experience to the NVIDIA app and transfers your preferences). Click on the UPGRADE button to install the app. Click on the AGREE & CONTINUE button on the next screen to agree to NVIDIA’s privacy policy and license agreement. Then, follow the on-screen instructions to finish installing the app.

Using the new NVIDIA app
After a successful installation, the app will launch. Unlike GeForce Experience, the new NVIDIA app doesn’t require you to log in to an NVIDIA account to use the app. Login is optional and is only required when you want to redeem RTX bundles or access exclusive rewards.
On the left side of the app’s home page, you’ll see dedicated tabs for the following menus:
1] Home

The Home tab displays a collection of shortcuts to the latest driver packages, a Library section where you can see all your games, and a Discover section for other NVIDIA apps, such as NVIDIA Broadcast, NVIDIA Omniverse, and iCAT. While the Library section allows you to launch a game or modify its graphics settings, the Discover section enables you to quickly install apps with one click.
2] Drivers

The Drivers tab allows you to download the latest NVIDIA drivers. You can choose between Game Ready Drivers or Studio Drivers (use the dropdown available in the top-right corner) and find information on what’s been updated, including what’s new and what’s fixed.

You can also view the release notes for the selected driver by clicking on the three-dots icon in the bottom-right corner of the screen or reinstall the driver if you have system instability issues (click on the icon and select Reinstall/ View Details).
3] Graphics

The Graphics tab gives you access to GeForce Experience’s optimal settings and NVIDIA Control Panel’s 3D settings, allowing you to fine-tune the graphics settings for individual apps or set a global profile for all games and apps.
The tab also gives you access to the optimization tool, which applies the recommended settings for a game based on your system with a click of a button (OPTIMIZE) and also allows you to manually adjust the settings through the use of a slider (you can move the slider up for Performance and down for better Quality based on your choice of Resolution and Display Mode).

NVIDIA has also added two new settings within the Global Settings tab: RTX Dynamic Vibrance and RTX HDR, which leads you to the in-game overlay, which now slides out from the left-hand side of the screen. The overlay has undergone a comprehensive redesign, enabling quick access to Shadowplay tools (Record, Instant Replay, Screenshot, Photo mode), alongside a Gallery of all your captures that appear on top of the UI through user-friendly thumbnails.
You can also decide whether to capture the Microphone using the toggle available at the bottom. While Shadowplay remains fundamentally the same, you can now capture up to 120 fps (previously 60 fps) with the Nvidia app beta.

Apart from this, the overlay shows a Freestyle Game Filters section that allows you to transform how your game looks by adjusting various settings such as Color, Contrast, Depth of Field, RTX Dynamic Vibrance, RTX HDR, and more. RTX Dynamic Vibrance and RTX HDR are new AI Freestyle Filters that make use of AI technology to improve the aesthetics of your games.
RTX Dynamic Vibrance enhances visual clarity per-app, allowing the colors to pop more on the screen, with a perfect balance to minimize color crushing and preserve image quality. RTX HDR uses RTX HDR technology to enable HDR support in SDR games.
Another major improvement is the Statistics section at the bottom of the overlay, which allows you to customize how the performance overlay is displayed during gaming sessions. You can select only the stats you want to see and position them anywhere on the screen in different orientations.
4] Redeem

The Redeem tab is where you can redeem game codes (that may have been bundled with your new GPU purchase) or get access to exclusive rewards, such as in-game content, exclusive GeForce NOW premium membership offers, and more. This is the only tab that requires a login.
5] Settings

The last tab is the Settings tab, which gives you access to the specifications of your gaming PC (Operating System, Graphics Card, Driver, Display, CPU, RAM, Storage, etc.), app features, library scan, notifications, and much more. The tab also features a shortcut to the old NVIDIA Control Panel, which will probably last only until the application is officially released.
Note:
- You’re effectively killing off GeForce Experience if you install the new Nvidia app.
- While NVIDIA continues to test and gather input on the new NVIDIA app before its official release, GeForce Experience and the NVIDIA Control Panelwill remain accessible to users.
- NVIDIA has also decided to discontinue a few features from the existing apps, reasoning that they were either underutilized or there were better alternatives available.
Read: NVIDIA graphics card not detecting HDMI in Windows.
How do I install NVIDIA drivers on Windows 11?
To install NVIDIA drivers on Windows 11, visit the NVIDIA website’s driver download section and download the latest drivers for your GPU model. Install the new NVIDIA app on your PC to get the latest driver updates. The app allows you to install Game Ready Drivers and Studio Drivers while giving in-depth information about what’s included in their latest release.
Read: How to Flash any BIOS to NVIDIA GPUs with NVFlash.
“Gadget Deals Unlocked: Save Big on the Latest Tech!”


