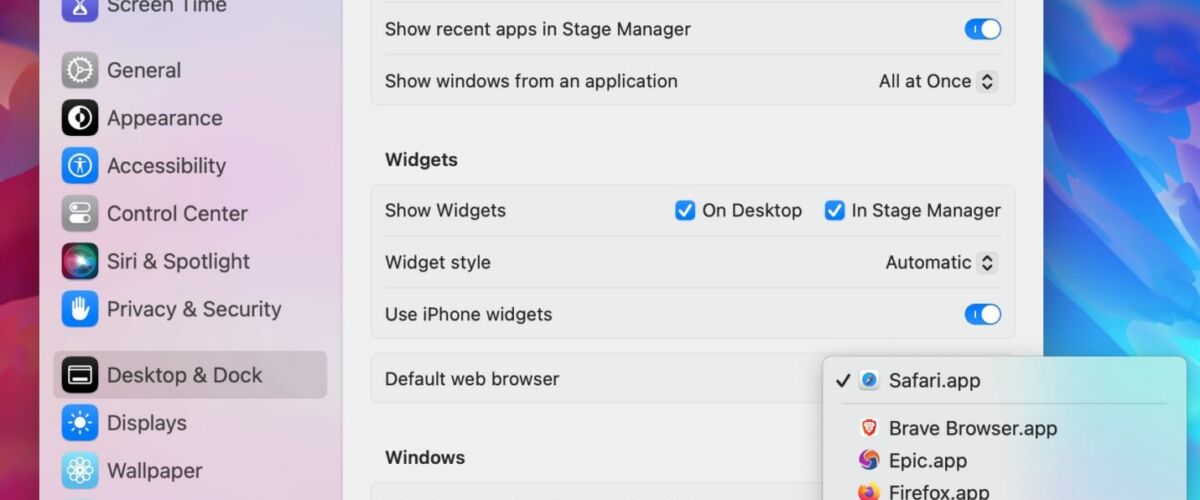

If you’re wondering how you can set the default web browser in macOS Sonoma to something else, maybe to Chrome, Firefox, Brave, or perhaps even back to Safari, you’ll find that it is relatively easy to do so. However, like so many other adjustments and tweaks to the latest macOS versions, it is different compared to prior versions of macOS and Mac OS X and what you may be accustomed to.
Web browsers are perhaps the most commonly used apps on computers nowadays and Macs are no exception. Safari is the default web browser on Macs, but anytime you install a new web browser on your Mac, it pushes itself to be set as the default browser, and many users may go along with that nudge to try out the latest browser, or just because we’re all accustomed to clicking through endless dialog requests. Since there are many web browser options out there, using a default web browser is a personal choice, and what some users may prefer, others may not.
How to Set Default Web Browser on MacOS Sonoma & Ventura
- Pull down the Apple menu and go to System Settings
- Select Desktop & Dock from the sidebar list options
- Scroll down until you find the “Default web browser” section and pull down the dropdown menu next to that
- Select the web browser you want to set as your default browser on the Mac
- Close out of System Settings when finished


Once the change to the default web browser has been made, all future clicks on links in other apps will open through that set default browser. For example if you had Chrome set as your default, and you chose Safari Tech Preview as the new default, then all links clicked in something like Mail or Notes would now open in Safari Tech Preview.
There are many excellent browser options out there for Mac, and other platforms too, and it’s such a matter of personal preference that it’s a good idea to experiment with a variety of options and use which is best suited for you, or that you like the best for your own individual needs.
If you’re interested in learning broadly about changing the default web browser on a Mac, go here, where we cover the necessary steps for all versions of MacOS and Mac OS X.


